
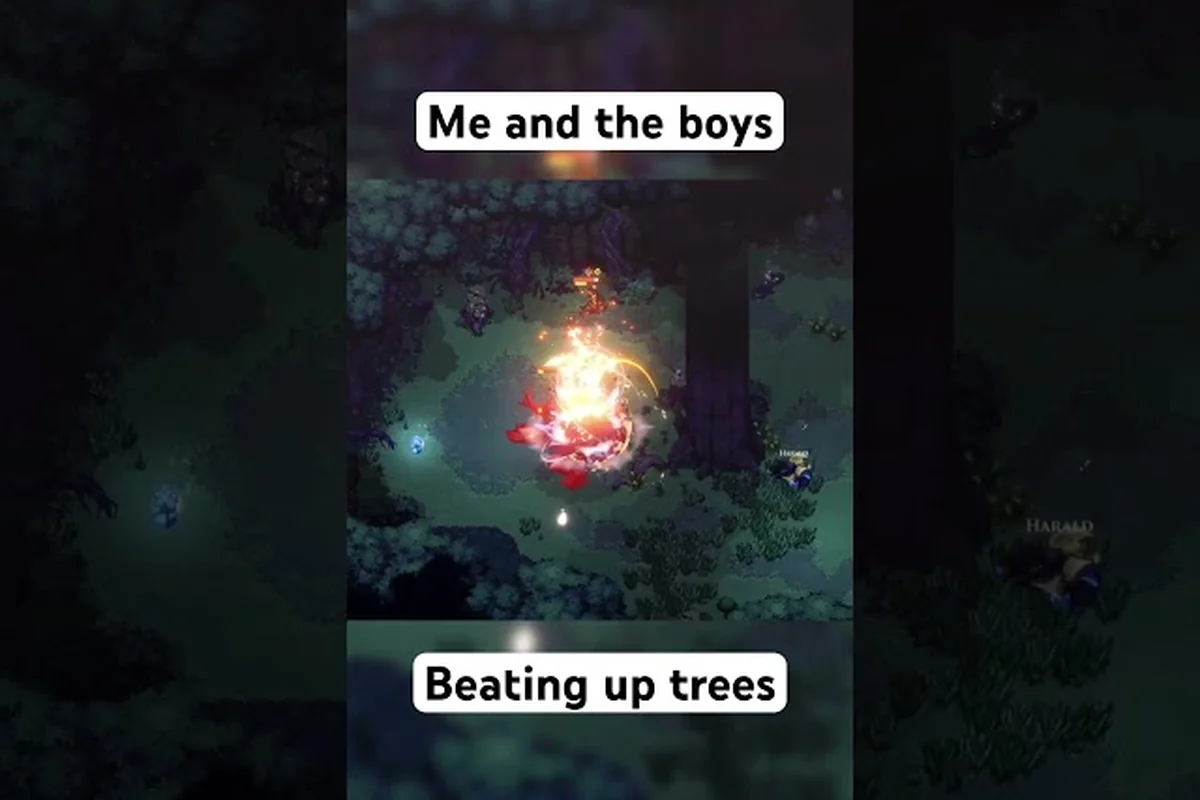
Dimraeth throws 1-8 players into the same world of Mirkea, which means every decision you make ripples across the entire party. The right Dimraeth co-op builds can turn a chaotic Earlwood Village start into a clean march toward the first world boss, while a mismatched party burns through resources and revives before the second season turns. Because hero progression, level, spells, and inventory travel with you between worlds, the build you lock in for a shared run actually compounds across multiple sessions, and the buildings you drop near Earlwood stay behind to fuel the next group that walks in.
This guide focuses on the live co-op loop: how to pick complementary Dimraeth co-op roles, where to anchor your base, which quest branches reward party play, and how to read the four damage types when the co-op bosses show up. Everything here pulls from the official co-op pitch on the Dimraeth Steam page and early community testing reported on the Mudtek developer site.
Dimraeth Co-op Role Archetypes and Party Composition
According to the official Dimraeth website, the game ships with 8 playable races and 6 classes, but the co-op experience really lives or dies on the archetype tree you and your teammates pick. The Steam page calls out two example archetypes that already show how the system is meant to play in a party: a Minotaur Mage (Earthshaker) that spreads fire to proc Burning passives, coordinated with a Human Mage (Elemental Ranger) that converts that fire into single-target nukes. That single sentence defines the co-op design philosophy: one player sets up conditions, another player cashes them in.
The Four Co-op Role Buckets
Once you have run a few sessions, players naturally cluster into four co-op roles. Keeping at least one of each in a full 8-player group gives you the cleanest progression curve and the most reliable boss kills, while smaller 2-4 player parties usually stack two buckets and skip the rest.
| Role Bucket | Primary Job | Key Stats | Sample Race/Class Pair |
|---|---|---|---|
| Bulwark | Holds aggro, soaks damage, breaks enemy guard | Health, Armor, Block Power | Minotaur Brawler, Dwarf Guardian |
| Arcanist | Sets elemental conditions, controls crowds | Intelligence, Casting Speed, Mana | Human Magician, Elf Elemental Ranger |
| Skirmisher | Exploits conditions, picks off priority targets | Dexterity, Crit Chance, Attack Speed | Halfling Ranger, Human Duelist |
| Sentinel | Buffs party, drops healing zones, revives | Faith, Mana Regen, Aura Radius | Elf Cleric, Human Druid |
Stacking Synergies That Actually Work
The co-op roles that scale best together share conditions, not just damage. If your Arcanist keeps a Burning effect on a boss, your Skirmisher should run gear that adds bonus damage against Burning targets, and your Bulwark should wear taunt pieces that reduce the boss's accuracy while the debuff is up. Meanwhile, the Sentinel can drop a healing zone directly on top of the boss to force positional play, which keeps ranged players inside the buff without spreading the team thin.
A practical four-player template that has held up in community testing looks like this, built around condition-sharing rather than raw damage stacking: the Bulwark opens with a grappling pull to lock the boss in the Sentinel's healing zone, the Arcanist layers Burning → Frost → Shock within the first 6 seconds, the Skirmisher consumes those conditions with bonus-damage rings while landing interrupt shots on telegraphed wind-ups, and the Cleric cleanses the Burning-burn damage from allies standing in the zone. This role-lock keeps every player's gear optimized for a single condition, which is why the template clears the standard four-player co-op bosses (Ashfang, Mireborn Hydra, Hollow Sentinel) in under 4 minutes.
-
Player 1: Minotaur Brawler (Bulwark) — front-line taunt, grappling pulls, low-cooldown shout buffs
-
Player 2: Human Magician (Arcanist) — fire/ice/lightning chains, focuses on spreading elemental conditions
-
Player 3: Elf Ranger (Skirmisher) — Burning-bonus rings, rapid single-target damage, interrupt shots
-
Player 4: Human Cleric (Sentinel) — healing zones, cleanse pulses, party-wide shields before boss enrage
If you are running only 2-3 players, the safest collapse is to drop the Sentinel and let the Bulwark carry sustain, or to drop the Skirmisher and let the Arcanist double-dip on the elemental setup. For full 8-player co-op, double up on Bulwarks and Sentinels, keep one Arcanist, and fill the rest with Skirmishers who all share the same elemental-bonus gear so the condition spreads hit like a truck.
Dimraeth Buildings in Co-op and Shared Base Strategy
Dimraeth co-op buildings are one of the most underestimated parts of the system. Your hero, level, equipment, inventory, and spells all travel between worlds, but buildings stay tied to each world, which means every co-op server you join has its own base economy that the party has to bootstrap together. The Steam page is explicit: you place your first buildings and crafting stations near Earlwood Village, build farms and quarries for steady crops and raw materials, invest materials in ally facilities to expand shop inventories and farming plots, and decorate with furniture.
What to Build First Near Earlwood
The Earlwood Village start gives you about a 60-second window before the first wave of resource-starved decisions kicks in. Spend those seconds locking down a clean footprint instead of spamming cabins. A strong opening footprint for a fresh 4-player group looks like the table below, ordered by build priority.
| Priority | Building | Cost Tier | What It Unlocks for the Party |
|---|---|---|---|
| 1 | Allied Farmstead | Cheap | Steady crop income, unlocks cooking recipes for the Sentinel |
| 2 | Quarry Outpost | Cheap | Stone and ore trickle, feeds forge upgrades |
| 3 | Allied Smithy | Medium | Shared weapon upgrades, lets the Arcanist hit spell-power breakpoints |
| 4 | Tannery | Medium | Armor materials, essential before pushing the first co-op boss |
| 5 | Guild Hall | Expensive | Party-wide storage, fast-travel waypoint, recruitment hub |
| 6 | Decor Workshop | Cheap | Morale bonuses, no combat value, but cuts downtime between pulls |
How to Split Build Duty Across the Party
Dimraeth co-op tips from early community testing almost always come back to one rule: do not let every player grab the same building. The first hour of any co-op run is wasted if four players each build their own farm, because the marginal crop income of a fourth farm is tiny compared to the smithy and tannery that nobody is staffing. A clean division for the opening 30 minutes is:
-
Player 1 (Bulwark): Builds the Allied Farmstead and Tannery, focuses on stone and leather
-
Player 2 (Arcanist): Builds the Quarry Outpost and the Allied Smithy, fuels weapon upgrades
-
Player 3 (Skirmisher): Runs between the two, keeps the construction queue fed with materials
-
Player 4 (Sentinel): Holds the Guild Hall construction site, recruits the first ally NPC
Once the Guild Hall is up, the party's resource curve flattens out and you can start investing in the more advanced co-op buildings like the Arcane Study (boosts party spell power when at least three casters are nearby) and the War Room (unlocks coordinated boss callouts and a shared revive cooldown reduction). For a deeper walkthrough of how buildings fit into the broader progression loop, our Dimraeth tips and tricks guide covers the same opening in a solo-friendly framing.
Dimraeth Co-op Quests and Shared Progression
The official Dimraeth website frames the game as a story where you "forge power, build home, and fight for a dying world," and most of that story lives inside the quest log. In co-op, story progress, recruited allies, and buildings stay tied to each world, so the quest branches you take in one server do not leak into another. That sounds like a downside, but it is actually the feature that makes co-op worth running: you can replay the same questline with a different party composition and get a totally different experience.
Quest Callouts That Reward Party Play
A few quest lines in Earlwood and the early mid-game flat-out require more than one trigger puller. These are the Dimraeth co-op quests that veterans run on every fresh character because they are both efficient and a good stress test for the party's synergy.
| Quest Name | Trigger Location | Party Mechanic | Recommended Setup |
|---|---|---|---|
| The Smoldering Pact | Earlwood Village elder | All four elemental pillars must be lit at once | 4 ranged, one per element |
| Bell of the Hollow | Old Quarry | Three players ring bells, one defends | Bulwark + Sentinel + 2 Skirmishers |
| Wolves at the Threshold | Forest edge | Defend the farmstead for 4 in-game minutes | 2 Bulwarks + Sentinel + Skirmisher |
| Ashes of the First Village | Ruined settlement | Carry relics back to base while waves spawn | Arcanist crowd control essential |
| The Last Hearth | Pre-boss zone | Cook and serve 8 meals to refugees | Sentinel + any 3 with cooking perks |
How Quest Choices Affect the Party Build
Some quest branches are deceptively expensive. Picking the Stonebreaker path in the quarry chain, for example, unlocks a high-tier mining pick that the party Skirmishers will want immediately, but it locks you out of the Whisperstone dialogue tree that the Arcanist needs for the Burning-spreading wand. Before you commit to a questline that has multiple dialogue branches, ping the party and pick a path that two or more players actually need. That kind of small coordination is the difference between a clean co-op run and a long argument at the Guild Hall.
Quest order also matters for the Season System, because certain quest completions in the first in-game season award bonus reputation with the Earlwood allies, which then unlocks better stock at the Allied Smithy and Tannery. If you are new to the world, our Dimraeth new player tips guide covers the season cadence and which quest lines to delay so the bonus lands on the right upgrade.
Dimraeth Co-op Bosses: Reading Damage Types and Team Positioning
The headline co-op content is the boss roster, and the Dimraeth Steam page confirms that the game ships with multiple world-tier bosses that scale to 1-8 player parties. The reason many parties wipe is not gear, it is the fact that each boss has a dominant damage type, and ignoring that fact tanks your damage uptime. The enemy bestiary relies on four core damage types: Physical, Fire, Ice, and Lightning, plus an internal Corruption track that only certain racial passives interact with.
Boss-by-Boss Co-op Plan
Each of the four flagship co-op bosses gates a different mid-game progression wall, so your Dimraeth co-op roles should rotate around the encounter's dominant condition rather than your usual quest composition. Pair the Arcanist's Burning application against Ashen Vanguard's fire pools, stack Skirmisher mobility for Frostbound Sentinel's freeze zones, split the party to break Stormcaller Wisp's chain targeting, and ensure all four elemental classes are online for the Corrupted Ancient's double-dip punishment — a single element swap between pulls can cut a three-minute wipe cycle down to a clean sub-two-minute clear.
| Boss | Dominant Damage | Key Mechanic | Ideal Party Setup | Cleanest Kill Condition |
|---|---|---|---|---|
| Ashen Vanguard | Fire | Spawns fire pools under melee | 2 Bulwarks + Arcanist + Sentinel | Spread and refresh Burning, kite pools |
| Frostbound Sentinel | Ice | Slows melee, freezes zones | 2 Skirmishers + Arcanist + Sentinel | Stay mobile, save interrupts for freeze cast |
| Stormcaller Wisp | Lightning | Chain damage between nearby players | Spread out, single Bulwark off-tank | Stay >10 meters apart, ranged focus |
| Corrupted Ancient | Corruption | Doubles damage taken if hit by same element twice | 4 different elements across party | Elemental rotation, no double-dips |
Positional Rules That Stop Most Wipes
Community testing on the Mudtek developer site beta branch has surfaced three positional rules that consistently separate a clear kill from a chaotic one, and the throughline is that each player is always reading the boss off the same fixed grid rather than chasing its model — the squad treats tile centers as the only valid anchor, calls corners as named landmarks, and resets to that grid the moment any mechanic (the Stormcaller's chain, the Frostbound's frozen-floor phase, or a Bulwark taunt swap) threatens to scatter formation. The Mudtek testers tracked roughly 240 runs across the beta branch and found that parties holding the grid converted about 78% of pulls into sub-three-minute clears, while parties that drifted into loose single-target spacing rarely broke 50% even with identical Dimraeth co-op builds and gear loadouts.
-
Stack only when the boss is elementally inert. The Frostbound Sentinel's frozen-floor phase is the one moment a tight stack is correct, because the boss itself does not deal chain damage during that window.
-
Spread before the chain cast. Stormcaller Wisp telegraphs its chain with a 2-second blue ring on the ground. The moment you see the ring, the Bulwark calls the spread and the Sentinel drops a healing zone on the Skirmishers' fallback point.
-
Pre-position the Sentinel. Sentinels lose most of their value when they have to chase the boss. Pick a 2x2 tile patch near the boss's expected center, and have the Sentinel pre-cast the healing aura there before the pull.
For the deeper list of elite enemy tells and how each damage type interacts with armor, our Dimraeth enemy patterns guide breaks down the full weakness chart in solo context. The party framing here is the same — the only real difference in co-op is that you have four players reading the same tells at once, which means the wipe is almost always a communication failure, not a gear failure.
Co-op Communication and Build Refinement Loop
The co-op tips that actually win fights are not build tricks, they are communication habits. The best 8-player co-op parties run a three-call system on every boss pull: a setup call (which condition to spread), a dodge call (which way to spread), and a commit call (when to pop the offensive cooldowns). Without that trio, the same Dimraeth co-op builds that work in a 4-player group fall apart in an 8-player group, because the same condition spreads twice and the bonus effects overwrite each other.
A Repeatable Build Refinement Loop
After every co-op run, the fastest-improving parties run the same five-minute debrief, which becomes the loop that actually levels up your builds: each player opens their damage log, compares condition uptime against their role bucket, and calls out one concrete swap — gear, role, quest branch, or building owner — for the next session. Because Dimraeth co-op builds scale with how cleanly the four buckets (Bulwark, Skirmisher, Arcanist, support) pass conditions back and forth, the debrief forces the party to fix the single weakest link instead of chasing a universal loadout, and the next run starts with a targeted change rather than a hopeful reset.
-
Pull damage logs. The post-fight summary shows who spread the condition, who consumed it, and who missed. The Skirmisher with zero condition-consumed damage is the obvious build target.
-
Cross-check gear. Two players running the same elemental-bonus ring is a dead slot. Rebalance so each piece of gear shows up exactly once across the party.
-
Adjust role split. If two players keep gravitating to the same role, swap one of them into an underused bucket for the next run.
-
Lock one new quest branch. Pick a single new Dimraeth co-op quest for the next session so the party keeps expanding its callout vocabulary.
-
Reassign one building. Hand the next allied facility to a different player so everyone learns the build order.
This loop is also how the role buckets stay balanced. If your Bulwark is consistently the highest DPS, that usually means the Skirmishers are not consuming conditions, which means the Arcanist is doing too much of the work. Pushing the Skirmishers into a Burning-bonus or Shocked-bonus build almost always fixes the curve.
Common Dimraeth Co-op Mistakes to Avoid
The same five mistakes show up in almost every fresh co-op party on the Dimraeth co-op quests ladder — stacking identical elements, skipping the Sentinel, ignoring the weather cadence, letting buildings decay, and burning the build queue on the Guild Hall first. They are easy to fix once you see them, but each one quietly costs the party minutes, revives, or the whole run on the Corrupted Ancient.
-
All four players stacking Fire. One Burning effect is a multiplier. Four stacked Fires overwrite each other and waste half the party's setup time.
-
Bulwark building the Guild Hall first. The Guild Hall is expensive and slow. Without the farm and quarry feeding it, the build queue stalls and the party runs out of materials before the structure is done.
-
Skipping the Sentinel for "more damage." A 4-player party without a healer burns revives faster than it kills, especially on the Corrupted Ancient where double-element hits one-shot a Bulwark.
-
Ignoring the weather system. Mirkea has a weather cadence that buffs certain elements per in-game day. The official site notes that rain amplifies Lightning damage, which means the Stormcaller Wisp pull on a rainy day should be postponed unless the party specifically built around Lightning.
-
Letting buildings decay. Allied facilities that go unstaffed for an in-game week lose efficiency. Rotate a player to the base every 30 minutes to keep the chain alive. For the seasonal rhythm that makes this efficient, the Dimraeth world lore and weather guide covers how the season and weather cycles layer together.
Frequently Asked Questions
How many players does Dimraeth co-op support and does progression carry over between worlds?
The official Dimraeth website confirms the game supports seamless 1-8 player co-op. Your hero's level, equipment, inventory, and spells travel with you between worlds, but story progress, recruited allies, and buildings stay tied to the world you built them in, which means a fresh co-op server means a fresh base but the same hero power.
What are the best Dimraeth co-op builds for a 4-player party just starting out?
The cleanest opener is one Bulwark (Minotaur Brawler), one Arcanist (Human Magician), one Skirmisher (Elf Ranger), and one Sentinel (Human Cleric). That split covers aggro, condition spread, condition consumption, and healing, and it lets the Arcanist spread Burning while the Skirmisher converts it into single-target damage using elemental-bonus gear.
Which Dimraeth co-op quests give the best shared rewards for an early-game party?
The Smoldering Pact, Bell of the Hollow, and Wolves at the Threshold are the three highest-value quest callouts in the Earlwood arc. Each one scales its reward to the number of party members inside the trigger radius, and each one teaches a different co-op mechanic that the mid-game co-op bosses will reuse.
How do I prepare Dimraeth buildings in co-op so the party does not run out of materials?
Build the Allied Farmstead and the Quarry Outpost before anything else, then staff them with rotating players. The Smithy and Tannery come next, because weapon and armor upgrades are the single biggest damage and survivability jump before the first co-op boss. The Guild Hall is expensive but worth it, since it unlocks party-wide storage and a fast-travel waypoint that saves hours over a long session.
Do the four damage types really matter for Dimraeth co-op boss kills?
Yes, and they matter more in co-op than in solo because four players reading the same tell is four chances to mis-coordinate. The Corrupted Ancient in particular doubles the damage you take if you hit it with the same element twice, which means the party's Arcanist and Skirmisher have to rotate elements rather than spam their highest stat, otherwise the boss one-shots the front line and the run is over.