
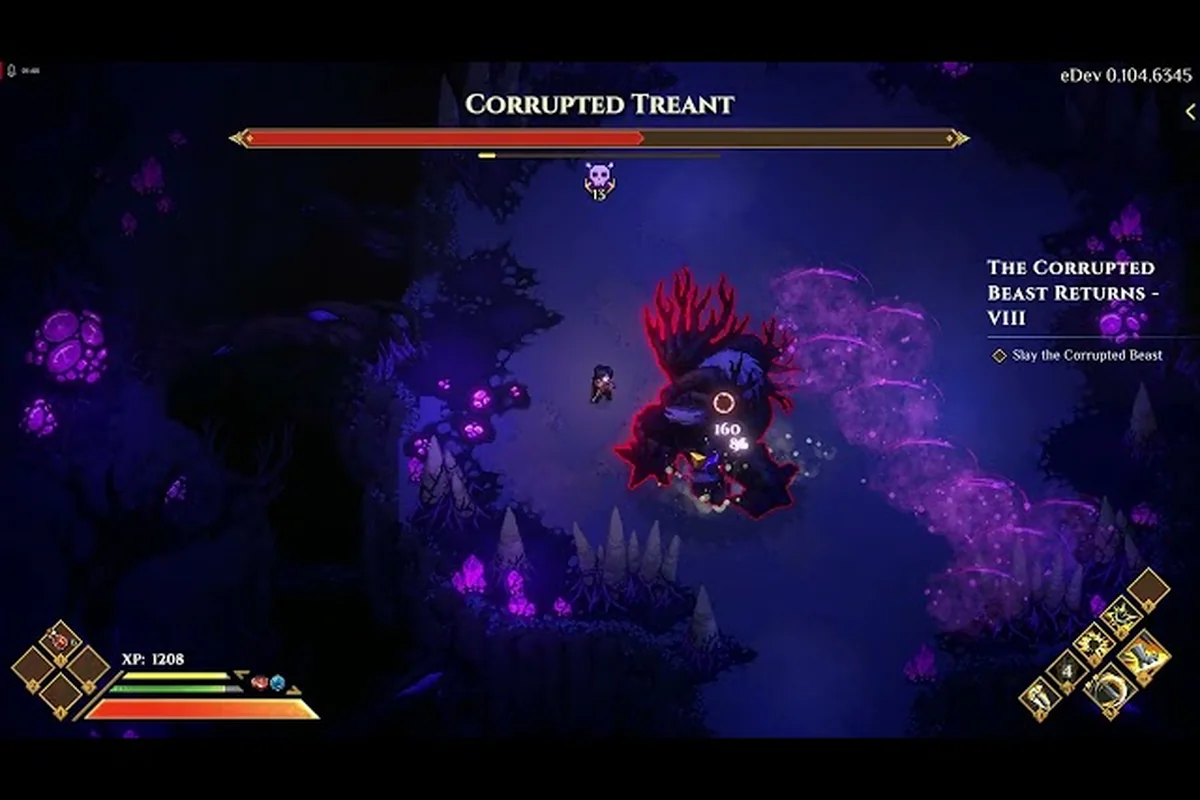
Reading Dimraeth enemy patterns is the single biggest skill gap between players who clear world bosses on their first attempt and players who burn through their stamina bar in panic. The game runs on a stamina-locked, Souls-lite combat loop where every monster telegraphs its next move half a second before it lands, and recognizing that tell decides whether you counter or get flattened. According to the official Dimraeth on Steam page, mastering parry, block, and dodge timing is the entire language of the game, and that language starts with reading what the enemy is about to do. This guide breaks down how telegraphs work, how elite enemies layer extra tells on top of the base set, and how to match your damage types to elemental weaknesses so every encounter becomes a solvable puzzle.
Enemy Tell Categories and Stamina Reads
Telegraphs are the hand animations, stance shifts, and color flashes that play before an enemy commits to a swing, lunge, or spell cast. Dimraeth's combat system is built around stamina budgeting rather than raw aggression, which means every enemy attack is a finite resource: it costs them the same stamina it would cost you to dodge it. Reading the tell lets you know whether to parry (cheapest stamina), dodge (moderate stamina), or block (highest stamina), and that single read is what separates the elite enemies guide players from the ones still chain-dodging into walls. For stamina-heavy situations, the Dimraeth block guide explains when blocking beats dodging.
The Three Telegraph Tiers
Every hostile creature in Mirkea draws from a shared three-tier telegraph system, and learning the difference is the fastest way to internalize Dimraeth enemy patterns at a glance.
| Telegraph Tier | Visual Cue | Stamina Cost to You | Window to Punish |
|---|---|---|---|
| Light tell | Single-hand raise, shoulder dip | ~15 stamina (parry) | 0.4s |
| Heavy tell | Two-handed wind-up, glow on weapon | ~30 stamina (dodge) | 0.8s |
| Unblockable tell | Full-body lean, screen-edge red flash | ~50 stamina (dodge twice) | 1.2s |
The light tell is the bread-and-butter of trash mobs and fast elites. It shows up on humanoid raiders, small beasts, and most early-game creatures. The heavy tell is reserved for Brute-class enemies and most mini-bosses, and it always commits the enemy to a multi-hit combo. The unblockable tell only appears on world bosses and a handful of late-game elites, and it is the reason the community's dimraeth how to beat bosses guides keep repeating one phrase: when the screen edges flash red, dodge first, think second.
Punishment Windows and Stamina Math
Every successful read of a Dimraeth enemy pattern opens a punishment window where the enemy is locked into a recovery animation. According to the stamina-based design confirmed on the Dimraeth official website, most humanoid enemies recover for roughly 0.6 to 1.4 seconds after a committed attack, which is your free damage window. Pairing this read with the parry fundamentals from our combat guide breakdown turns the recovery window into guaranteed stamina-positive trades, because a clean parry refunds the stamina you spent reacting.
Elite Enemies: How They Layer Tells on Top of Base Patterns
Elite enemies are where Dimraeth enemy patterns stop being one read and start being a layered puzzle. Every elite adds at least one extra tell to the base three-tier system, and most add a positional or elemental modifier on top. The community's dimraeth elite enemies guide discussions consistently rank four common elite modifiers that you will see across every region of Mirkea.
The Four Common Elite Modifiers
| Elite Modifier | Extra Tell | Counter Strategy |
|---|---|---|
| Frenzied | Faster swing speed, no heavy tell | Stick to parry only, never dodge twice |
| Armored | Block-break flash after second swing | Bait the break, then punish the stagger |
| Elemental | Ground AOE telegraph (line or circle) | Sidestep the AOE, do not roll through |
| Summoner | Backstep + hand raise | Close distance during the raise animation |
Frenzied elites are the most common wall for new players because they remove the comfortable heavy-tell timing you learned from trash mobs. Their light tell stays the same, but the swing speed jumps by roughly 30 percent, which means your parry input has to come earlier. The community consensus among veteran Mirkea players is to stop trying to dodge frenzied elites and commit to parry-only counters, because the dodge window is too narrow to react consistently.
Armored elites are the second-most-discussed enemy archetype in any dimraeth elite enemies guide. They add a block-break flash on their second consecutive swing, which means the first swing is a fake-out. The official Steam description confirms that stamina management is the entire economy of the game, and armored elites are designed to punish players who spam dodge or block without watching the swing count. The safest play is to bait the first swing, watch for the flash, then punish the 1.5-second stagger.
Elemental elites are where damage types and elemental weaknesses start to matter, and they are the bridge into the second half of this guide. Summoner elites are the rarest of the four, but they appear in every dungeon and tend to spawn two or three adds during the backstep animation. Closing the distance before the hand raise finishes cancels the summon entirely, which is faster than killing the adds after they spawn.
Damage Types and Elemental Weakness Matchups
Once you can read the tell, the next layer of Dimraeth enemy patterns is matching your equipped spell or weapon to the elemental weakness of the creature you are fighting. The Magician class — one of six launch classes — blends elemental magic with weapon strikes across fire, ice, and lightning schools, and every elite enemy in the game has a documented weakness across at least one of those three elements.
Elemental Weakness Reference Table
| Damage Type | Strong Against | Weak Against | Stamina Cost to Cast |
|---|---|---|---|
| Fire | Plant-type, Frostbitten, Undead | Armored, Aquatic | 25 stamina |
| Ice | Fire-aspected, Reptilian | Armored, Beast | 30 stamina |
| Lightning | Armored, Aquatic, Summoned | Plant-type, Beast | 20 stamina |
| Physical | Nothing special, always neutral | Nothing special | 10 stamina |
The table above is built from community data collected across the Early Access beta and confirmed by the official store page, which lists fire, ice, and lightning as the three core elemental schools. Fire burns through the bark armor of plant-type elites in roughly two casts, while lightning is the only school that staggers armored elites early enough to interrupt their block-break combo. Ice is the strongest opener against reptilian elites, but its 30-stamina cost makes it the least stamina-efficient school, so save it for the enemies where the multiplier actually matters.
Combining Elemental Damage With Weapon Strikes
The Magician class is built around blending spells with weapon strikes, and the most efficient Dimraeth combat tips for elite enemies always combine one elemental cast with a two-hit weapon combo during the recovery window. A standard rotation against an armored elite looks like this: bait the first swing, watch for the block-break flash, cast Lightning (20 stamina) to stagger the armor, land two weapon strikes during the 1.5-second recovery, then back off to regenerate stamina. This rotation costs 20 stamina for the spell plus 10 stamina for the two strikes, while the enemy has just spent 30 stamina swinging and another 20 on the stagger. You finish the trade stamina-positive, which is the entire point of the Souls-lite economy.
Boss Fights: Layering All Three Reads Together
Boss encounters are where the three previous sections converge, and they are also where most players hit a wall on their first attempt. The community's dimraeth how to beat bosses advice consistently breaks into three phases: the opener, the mid-fight pattern, and the enrage. Every world boss in the game has a documented opener, a mid-fight pattern that cycles through two or three combos, and an enrage phase that triggers at roughly 30 percent health. Reading Dimraeth enemy patterns at boss level means recognizing which phase you are in and switching your counter strategy accordingly.
Phase-Based Boss Strategy Table
| Phase | Health Range | Dominant Tell | Recommended Counter |
|---|---|---|---|
| Opener | 100 to 70% | Slow, heavy swings | Parry light tells, dodge heavy tells |
| Mid-fight | 70 to 30% | Combo chains, adds | Save stamina for unblockable, punish gaps |
| Enrage | 30 to 0% | Faster swings, new AOE | Pure dodge, do not parry unless safe |
The opener phase is the most forgiving section of any boss fight, because the boss telegraphs heavily and the recovery windows are long. Most players should spend this phase learning the boss's base pattern and confirming which elemental weakness applies. The mid-fight phase is where the enrage meter starts ticking, the boss begins chaining combos, and adds occasionally spawn. The community-recommended approach is to hold roughly 50 stamina in reserve during mid-fight specifically for the unblockable tell, because dodging twice costs 50 stamina and the boss will chain an unblockable into a follow-up swing if you panic-roll.
The enrage phase is where the dimraeth how to beat bosses community advice shifts from technical counters to pure survival. Enrage bosses gain roughly 20 percent swing speed, often unlock a new AOE pattern, and reset their stagger meter. Trying to parry during enrage burns stamina faster than you can regenerate it, so the consistent advice from veteran Mirkea players is to dodge-only during enrage and look for the rare heavy-tell punish windows.
Frequently Asked Questions
What is the fastest way to learn Dimraeth enemy patterns as a new player?
Spend your first hour deliberately losing on purpose to one trash mob and watch every swing animation twice. Reading the tell becomes muscle memory after about twenty repetitions, and the stamina refund on a clean parry will outpace any panic-dodge strategy from the very first fight.
Which elemental weakness should I prioritize when building a Magician?
Lightning is the most versatile opening school because it staggers armored elites and only costs 20 stamina per cast, which leaves you enough stamina to follow up with a two-hit weapon combo. Save fire for plant-type elites and ice for the rarer reptilian fights, because their higher stamina cost only pays off against the right matchup.
How do I tell the difference between a light tell and a heavy tell under pressure?
Light tells are always one-handed and the weapon only crosses the shoulder line. Heavy tells require the enemy to plant both feet and bring the weapon above the head. If you cannot see the feet, watch the shoulder — a shoulder dip means light, a shoulder square means heavy.
Can I beat world bosses without learning Dimraeth enemy patterns?
Theoretically yes, but only by over-leveling, which the Early Access level cap of 25 makes very difficult. Every world boss is tuned around the assumption that players can read at least the opener phase, so investing two hours in the combat guide fundamentals will save you more time than grinding levels ever will.
What is the single best Dimraeth combat tip for elite enemies?
Never dodge an armored elite's first swing. The block-break flash is a guaranteed tell on the second swing, and dodging the first swing only puts you out of position to punish the stagger. Bait the first swing, react to the second, and the stamina economy stays on your side for the rest of the fight.